Friday, November 30, 2012

Green crochet scarf and brooch

-->
Here is the scarf! It wasn’t difficult at all, actually. I remember thinking when I was a student that I would never ever have the patience to finish a large crochet project. It took me 7 years to finish a flower poncho, and now - what a progress! – the scarf took only a couple of weeks in total. It took several goes of undoing the stitches because of mistakes (making triangles or pentagons instead of squares, or starting a new row along the long side of the scarf instead of the short), but luckily I never had to undo more than one row.  When it was finished, I still dreaded spreading it out – what if there was a triangle lurking somewhere in the middle?


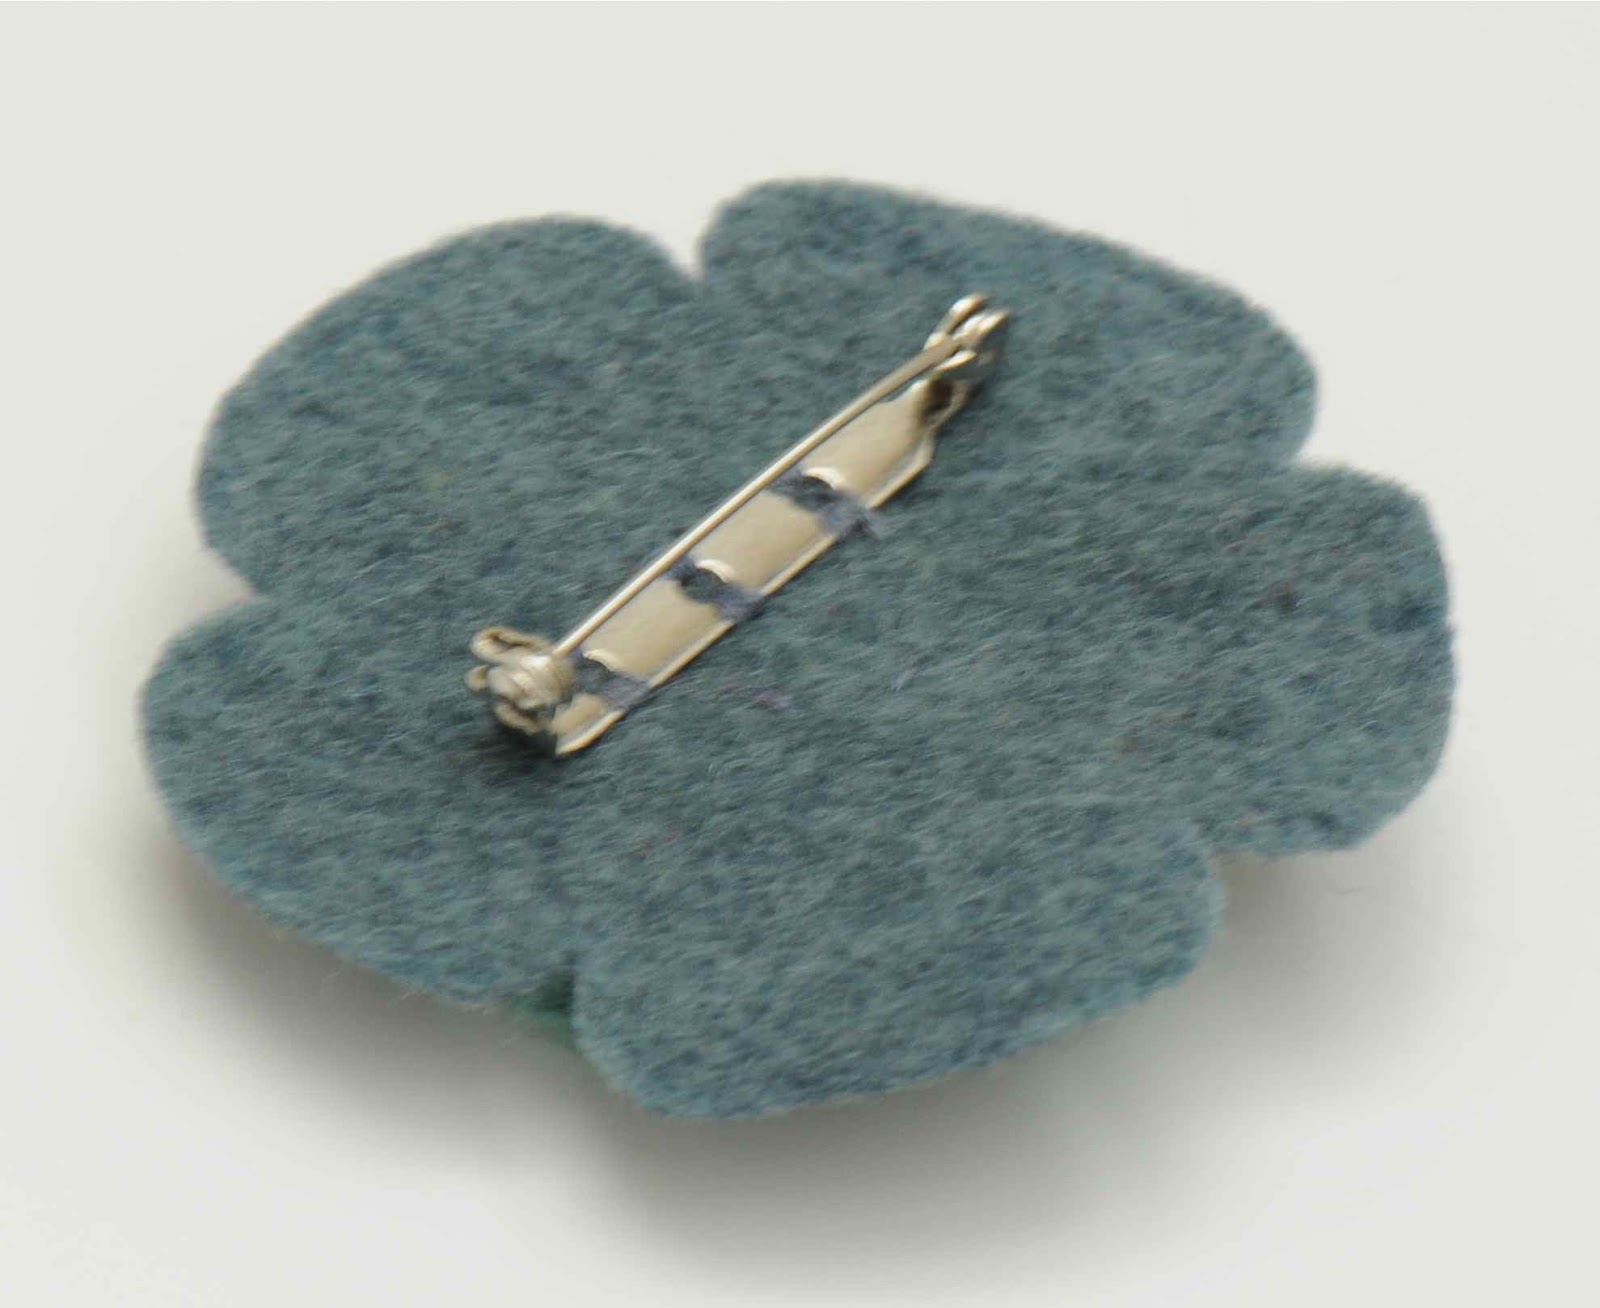
Since the scarf is quite dark, I thought it needed something to it. So I’ve also made a flower brooch in a lighter green shade. This Gluis Yarn is hand-spun by a local crafter (http://gluisyarn.weebly.com) and can be purchased in small skeins in a variety of colours. 


Tuesday, November 13, 2012

Style: Art Deco black cat

-->
One of the advices that I keep coming across when reading about selling crafts is this: make the shop consistent, develop a recognizable style. I can see that many of the successful shops do indeed look consistent: matching colours and patterns, defined sets of materials.
It’s very difficult though to apply this to myself, the simple reason being that I like variety in what I do. Crocheting for a couple of weeks, then hand-stitching cute felt things, then machine-sewing something less cute, more stylish (or so I say to myself), like iPad covers. Then – gemstone and bead jewellery. Then painting paper-mache boxes. Can it really be true that I have to pick just one and drop all the rest, or open one shop per each type of items I produce?
Maybe it’s a question of time. Maybe one gets fed up with many styles but one – probably the one that best reflects the personality?
Please share your story! Have you settled on one type and/or style, and if yes – how did it happen?

On the practical side: this is my Art Deco black cat, made from upcycled (or recycled?) wool fabric. It is 38 cm tall. I was considering giving it long eyelashes, but then its face would look like Bratz doll’s, and that was NOT what I wanted. As it is, it looks thoughtful and peaceful – I was actually pleased that I managed to give it the intended expression.
On even more practical side: the cat itself and the the PDF pattern are available for sale in my ETSY shop.


Art Deco sitting black cat soft toy ornament сидящая черная кошка


Art Deco black cat soft toy ornament сидящая черная кошка


Art Deco sitting black cat soft toy ornament сидящая черная кошка


Saturday, November 10, 2012

Crochet net scarf in making

Recently I found myself drowning in crafts supplies.  Even trying to be super-organized doesn’t help – not that I manage that very well either! Which means that either my storage system needs revision, or that I need to make more beautiful/pretty/cute/useful creations and find new homes for them. Here is a project I am doing to help with the overflow. I had two skeins of very soft and fluffy yarn (50% merino wool, 50% acrylic) in a beautiful green colour, so I decided to crochet a net scarf. The inspiration came from here - thank you to Olga! It’s very easy to make, and the best of all is that it grows very quickly, I’ve used up one skein already. The pictures of the finished scarf to follow!

Green crochet net scarf, шарф крючком

Friday, November 9, 2012

Inspiration: Irish lace

When visiting Ireland in summer, we stumbled upon a small museum of lace in Kenmare, “Kenmare Lace and Design Centre”. With me being a textile addict we, of course, had to go and check it out. Here is a souvenir set of cards: 

Antique crochet lace


-->

The centre is very inspirational: not only it has a very impressive examples of antique lace, but also a selection of contemporary crafts as well as craft supplies for sale. After seeing that, I was itching to go back home and crochet something as intricate as possible. Here is what I’ve done.
There was a small green organza bag lying in my supply box and waiting to be used, so I decided to decorate it with crocheted flower (the same pattern as for the legwarmers) and make it into a lavender pouch. I used a plain green sewing thread and, just to add more history to it, a 100+ year old hook that I got from my grandmother. Now that must qualify as lace! The bag is available in my shop.

Organza and crochet flower lavender bag

Organza and crochet flower lavender bag

Organza and crochet flower lavender bag
 

Friday, November 2, 2012

Flower pincushion


I finally got to handle the REAL sheep wool. Having grown up in a city, it was an unforgettable experience! During our trip to Ireland, Beara peninsula, I saw children playing with sheep wool. I didn’t know exactly what I could use it for, but I wanted some anyway, and a kind farmer gave me a whole bag.  What I hadn’t realized was that the wool was in its most native state and needed some work before it could be used for anything. On the way back from Ireland it felt like we had a live sheep in the car, even though the wool was sealed in two layers of plastic bags... But a thorough washing (according to instructions found on the internet) turned it into something soft and fluffy and very pleasant to handle. 


After washing


Yuk!
I read somewhere that sheep wool is the best stuffing for the pincushions, as the residual oil on the fibers lubricates the pins and prevents rust. Don’t know how much oil is actually left after washing the wool, but I wanted to try. A new pincushion was on my “to do” list for months. A piece of an old green sponge that I used as a pincushion was an eyesore, and it was tiring having to crop it off the photos. Here is what came out of it:

Pincushion, pin cushion, подушечка для булавок

Pincushion, pin cushion, подушечка для булавок


It’s too early to say anything about rust, but it’s definitely better than sponge, cotton wool (both too hard) or polyester wool (doesn’t hold the pins well).

Crochet leg warmers

Hmm, it has been a long time since I've written here. Not really in line with my «9th of June Resolutions», but I don't give up. Especially that I have lots of projects to share, enough for several posts. 

Here are the leg warmers for my older daughter:

Crochet leg warmers

Crochet leg warmers

Crochet leg warmers

Crochet leg warmers


They are crocheted from 50% merino wool, 50% acrylic double knitting yarn, hook sizes 5 and 6. The instructions are modified from here.

Lower cuff:
Starting at lower edge with smaller hook, ch 30, join with sl st to form ring, ch 2, do not turn.
Crochet leg warmersRow 1: Sc in each ch, join with sl st in top of ch-2, ch 2, do not turn.
Rows 2 through 8: Repeat Row 1.
Middle:
Row 9: With larger hook, ch 2, hdc in each sc across, join with sl st in top of ch-2, ch 2, turn.
Repeat Row 9 to length desired.
Upper cuff:
With smaller hook, repeat row 2 eight times. After last sl st, fasten off.


Crochet wool and hooks


The flower was made using a beautifully illustrated tutorial here, with the only difference that I’ve made three layers of petals only. The brown yarn was leftovers bought from a charity shop, feels like pure wool. As it was rather thin, I used hook size 2.5.

Dear readers, could anyone recommend software for Mac, preferably free, to draw crochet patterns?

Thursday, July 19, 2012

Crochet flower poncho


Hurray, it's done! The longest ever project is finally finished – I cannot believe it. The story behind this poncho is in the last post. As my older daughter grew from 4 to 10 years old in this time, her taste changed, and flowery romantic stuff is not suitable any more... So the poncho belongs now to my 6 year old daughter (I promised the older one to crochet leg warmers instead, to keep peace in the family):

girls crochet flower poncho

girls crochet flower poncho


The schemes and diagrams are here:

Friday, July 13, 2012

Cat notebook and finishing an old project


In spring I've made a couple of felt notebook covers with a picture of a calm black cat sitting next to a houseplant. These turned out to be a success, so this week I've made some more:


It was a pleasant experience to take them to our new local arts and crafts shop SewArty.

Thanks to «Coffee and crafts» mornings at Sew Arty I've also been able to get on with my other project, which has been neglected for years. It started as a crocheted flowery poncho for my daughter, who was, I think, 4 at that time. I modified the design for a shawl found on one of the Russian blogs; unfortunately, I cannot remember which one (it was 6 years ago), but recently I found the description on several other blogs. 

So I began to crochet the motifs. After about 20 I got really bored and stuffed the bag with the motifs and yarn somewhere out of sight, not to give me bad conscience. Then, two years ago, when we went on a driving holiday around Scotland, I took the bag with me and crocheted another 20 or so motifs. I can now recognize the motifs made there – soft, stretchy and relaxed in every aspect. 


Two months ago, the wait for the car to be serviced resulted in 5 more motifs. Finally this week I took what I had to «Coffee and crafts». Showing the pile of crocheted flowers to other people and talking about how it is going to look like when it's finished really got me inspired again (and added that healthy bit of pressure to be able to show the finished poncho in a week's time). 
2 1/2 still missing - that was yesterday!

I am now half way through joining the finished motifs together!  The ambitious goal is to finish the poncho this weekend. Pictures to follow!

Saturday, July 7, 2012

Elderflower cordial, moss agate pins and more


The sun has finally shown itself a couple of days ago – wasn't that wonderful! To mark this rare occasion, we went with the girls to pick elderflowers to make elderflower cordial. It is the end of the season, so it was not easy to find 50 flower clusters that are needed to make 3 litres. Somehow almost all the trees that still had flowers were surrounded by stinging nettles – just to make the task a little more challenging! But we persevered and got all 50. I used the Danish recipe from my husband's family, which has an additional meaning to me because of Hans Christian Andersen's fairy tale «The Little Elder-Tree Mother» («Hyldemoer”), and I loved those stories as a child. Here is the recipe:
50 elderflower clusters                                                                                                                          
3 kg sugar
3-4 lemons
75 g citric acid (from a pharmacy)
3 l water.

First dissolve the sugar and the citric acid in water. I heated up the water in a pan to speed up the process. Let the syrup cool to room temperature and add the flowers and chopped lemons. Let the mixture infuse for 48 hours, stirring it occasionally, filter it through the clean cloth, and pour into bottles. Last time I’ve made it, I used glass bottles and stored them in a fridge; unfortunately, in a few months whatever was left became mouldy and had to be thrown out. This time I bought a pack of eight 500 ml bottles of still water; I used the water for the syrup, and plan to pour the cordial into the plastic bottles and freeze them.

I’ve also tried my hand at jewellery making – pictures of the new creations to follow, as it is too dark to photograph now, but here are some moss agate pins that I’ve made recently:


Apart from experimenting, the last few days were dedicated to doing what I actually promised to other people. It’s amazing how the wish not be seen as unreliable spurs me into action! So here are some little boys’ jeans that a friend asked me to patch, and a second “Poppy cottage” felt doorstop, which will be on its way to Denmark on Monday:


Tuesday, July 3, 2012

Felt and crochet flower brooch - experimenting with photography


 Now that my crafting corner is much more pleasant to use, I finally got to make something here. It's a brooch made of crocheted flower, an orangy-yellow ball (a circle of felt gathered around the edge and stuffed with polyester wool) and grey and blue-grey felt. 

Now to the photography. 

I've looked through all the photography books in the nearest two libraries in the past year while learning to use my DSLR, but there were no books on crafts photography. I considered buying a book, such as "Crafter's guide to taking great photos" by Heidi Adnum. The reviews on Amazon are excellent. On the other hand, I try to watch my craft-related expenses and not to make any unnecessary purchases. I might still buy the book at some point, but there is so much free information on the internet, including tutorials on how to make a light-box, advice on background  and other great photo tips.  

 I used to photograph all my creations on a plain white background (the back of the children's map of the world - it's huge!). But some of the photos on Etsy, Folksy and other handmade marketplaces, where a piece of jewellery is placed on an antique book, or a map, or a seashell look stunning. So I decided to experiment with the background. Seashells and fluffy yarn and felt didn't go well together at all.  I haven't even taken a photo, but now I think I should, just to compare.

Here I used our family heirlooms, an old Russian fairy-tale book and an old Danish book about Marie Curie:   


Not sure whether this is any better than plain white background:


This one is a bit out of focus - needs to be replaced


In the next few days (given sufficient light and time) I will photograph some of my other creations on different backgrounds and post the photos to compare how they look on the screen.

Monday, July 2, 2012

Crafts corner

For the last few days the mess at my workplace has been in the way of any possible creativity. It's like a swamp: the creativity just drowns after the first couple of steps. So I decided to tidy up and organize. This is the «Before» photo:

Br-r-r.


I've searched in the past for the crafts corner organization ideas (see this link), and almost a year ago I came up with this system:

Better!


I am rather proud of it, because it survived for so long, which means it's functional. It uses PAPPIS boxes from IKEA, 79 p each. 


The dimensions of the boxes are really convenient, they can be stacked under the table (which is a former dining table), and there is still a bit of space to stuff an odd piece of paper of cardboard on top (until it's time to tidy up again). I've made the labels for the boxes using leftovers of natural brown hessian and white linen fabric. The hessian part measures 12 x 17 cm, linen part is 8.5 x 12 cm. First the picture is painted/embroidered/glued onto/attached to the white part of the label, then the white part is machine-stitched onto the the hessian part. Finally, the labels are glued onto the boxes, on the same side of each box. 


The label has to be well thought through for the system to work well. In fact, the whole system has to be thought through before the labels are made. From my experience with my children, the system must be intuitive, convenient and easy to use, otherwise it will just create more mess rather than helping organization. 


 I've made the following categories for my supplies: felt pieces, yarn (two boxes), embroidery floss, paints, stuffing (polyester wool), wadding, nature objects (twigs, bark, pine cones, shells), blank notebooks, finished gifts.  Then I just let the imagination take over. The label for embroidery floss is embroidered with the said floss, and the label for paints is painted. 


The labels for the yarn boxes feature fluffy yarn spirals, while the label for polyester wool box has a 3D picture of cotton made of cotton wool and a piece of an old T-shirt. (Unfortunately, the photos are not very good: what looks black on the label is, in fact, green).


Now I have a problem. For several months now I've had a box which I named «miscellaneous». 

It contains zip-lock bags, cellophane bags for finished products, product tags, cut-up threads for the tags, supply of glue sticks for the glue gun, some patterns for my creations, my business cards and receipts from the crafts shops. This is after I removed from there chains from the hanging baskets (I used the chains to make a hanging pouch for our chinchillas), balls of string and twine and some other stuff I've been hoarding. The question is: what should the label for this «miscellaneous» box look like? Will really appreciate suggestions!