Sunday, October 26, 2014

Vintage-look e-reader cover

Having served faithfully for almost four years, this summer my Kindle has given up. I very quickly received a replacement as an early birthday present :) The new e-reader was smaller and so the cover that I had made for my old Kindle was far too big - a new cover definitely had to be made!
I had two types of ..hmm.. supplies that I wanted to use up. The first was a ball of mercerized cotton yarn in a vintage cream colour, bought in a charity shop ages ago; what I had in mind when buying it is a mystery to me. I tried to crochet several things with it, but they all came out too thick and stiff - I've undone them all, except for this square motif, made using a diagram here:


 I also had scraps of grey linen-look fabric - remains of the cushion cover from IKEA. I used this fabric as a background for the Phoenix picture and for another felt applique (which I will post soon), and also for the feathery doll "Growing wings". The scraps were too small for a book-cover style holder - so it had to be a pouch. I also used heather-coloured lining fabric from my stash and cotton wadding. The crochet motif was hand-sewn onto the grey fabric, and after that I had to invent as I went along.


The cotton wadding was cut


and hand-sewn using a hemming stitch, rather than machine-sewn, to avoid the seam bulk. This layer was then inserted into the grey fabric pouch, and from that moment the two layers were treated as one.
I tried it with a zip first:


After shortening the zip, stitching it in and making all the edges and corners neat and tidy, it turned out that the opening was too small for the e-reader to go through without being scratched by the zip.
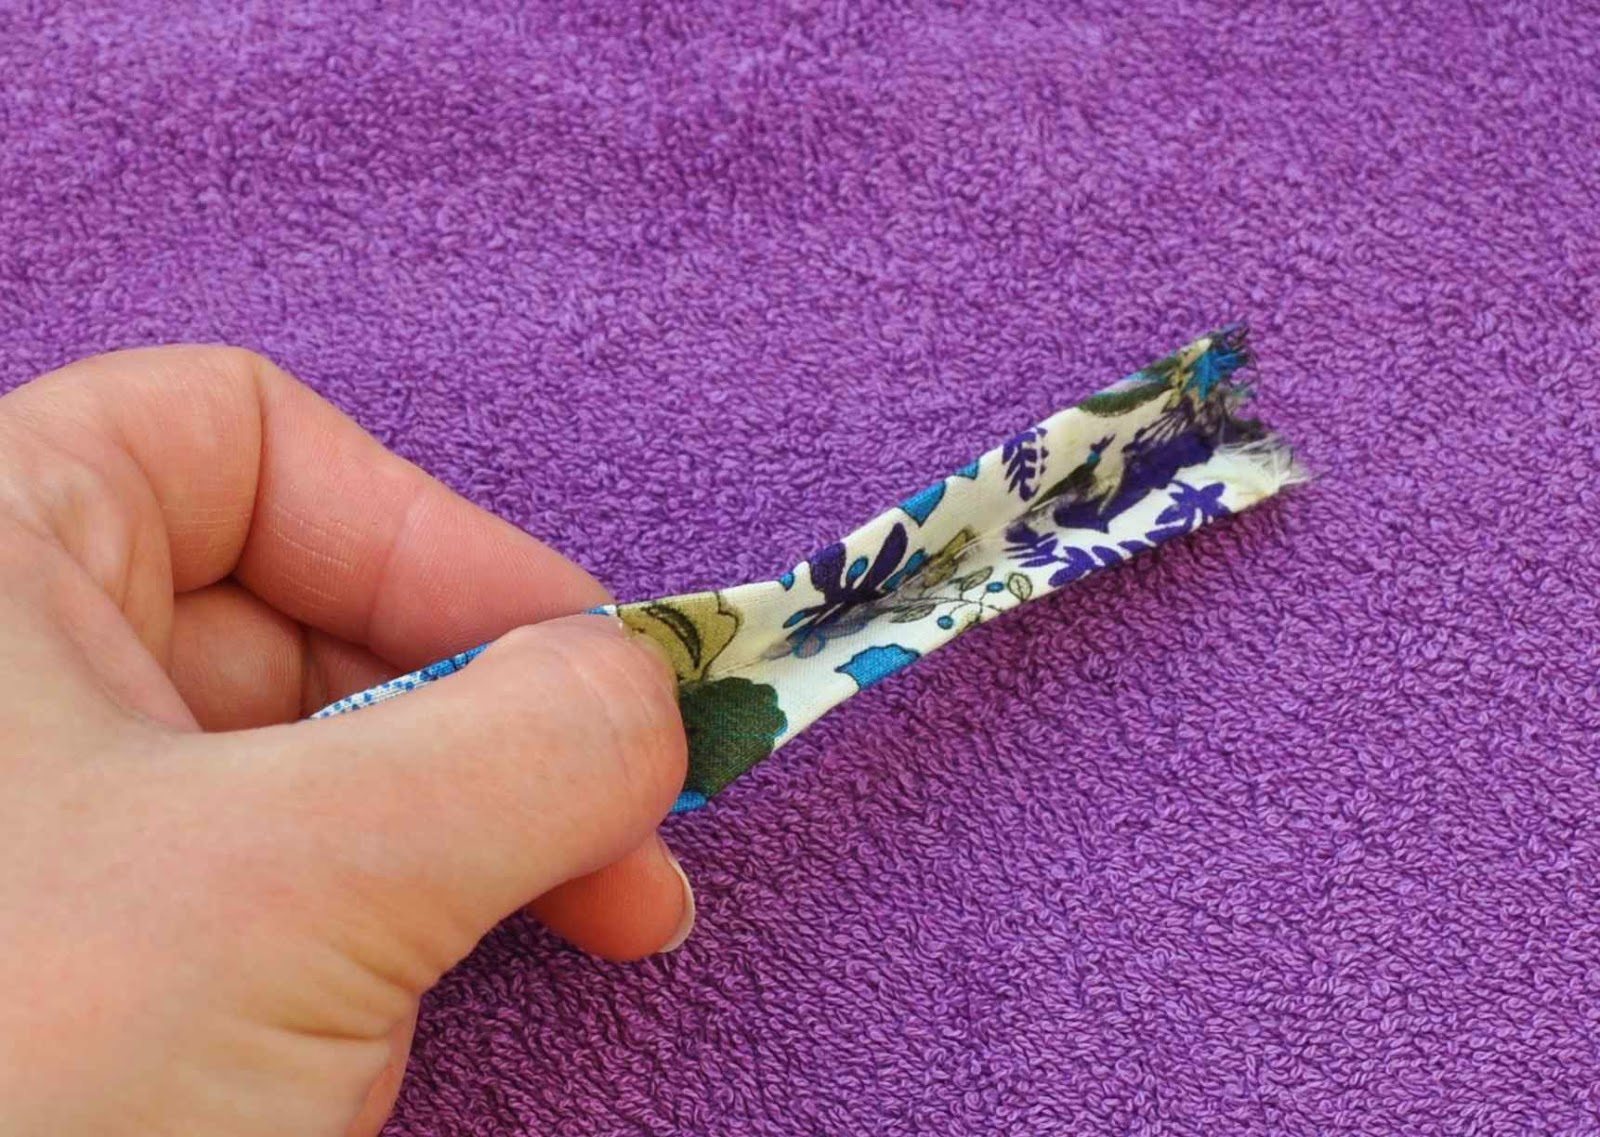
I've taken out the zip and made a loop instead - that worked much better:


I had a covered button in my stash, cut off from an old skirt; I unpicked it with a small screwdriver, took off the old fabric it was covered with, replaced it with my grey fabric the way covered button are usually made and pressed the parts of the button together again:


Wednesday, October 22, 2014

Crochet cowl scarf

During summer, one of the children's projects involved yarn, so I allowed them to look in my stash. Then one thing led to another: the girls left the yarn where the puppy could get it, the puppy got it, and as a result, next day I had this beautiful dark-red acryl yarn spread all over the lawn.  Luckily, it was dry, but the yarn became a large tangle, which existence annoyed me for weeks. So I decided to use it up by crocheting a scarf. I found the scheme here. The yarn was double-knitting, as far as I remember, and I used hook size 5, as I tend to crochet very tightly. A few rows in I realized that I made a mistake: the loops of 3 chain stitches (row number 4 in the diagram) became loops of 4 stitches in my hands... But it didn't look bad, so I continued with 4 for the rest of the scarf.
And, of course, by the time I got to the end of the tangle, it became evident that what came out is too short to be just a long lacy scarf. So I joined the last row (which in my case was the row of loops, number 4 in the diagram) to the first row, and turned it into a cowl. Here is what it looks like:


Wednesday, July 23, 2014

Bathrobe upcycle project - teddy bear bathrobe

When I took apart my old bathrobe to dye, the places where the pockets have been were still very visible. Also, after dying, it turned out that the elbow of the right sleeve was worn out more than the rest of the fabric, and it dyed unevenly. Because of all this, I had to abandon the idea of making matching washcloths. But there was enough fabric to make a bathrobe for my younger daughter's teddy bear. She has been asking me to make the whole wardrobe for him, and made dotty pants herself to start the process:


The pattern is mostly rectangles: one wide for the back, two for the front, two for the sleeves. The  curved lines are for the back of the hood, the neckline and the bottom of the pocket.


I also made a belt out of 4 cm wide strip of fabric. I've made the same way as bias binding is made: folded the strip lengthwise in half, then folded in the long edges. To make the ends neat, I had to stitch over a bump, made out of 8 layers of fabric. I learned a trick to do that: either hammer the bump or flatten it with pliers. One should really wrap the bump in unwanted cloth first not to damage the garment one is making, but the towelling fabric is very forgiving, so I just squeezed it as it was:


 The same can be done anywhere where one has to stitch over a bump of seam allowances:


And here is the finished bathrobe:


Wednesday, July 16, 2014

Bathrobe upcycle project - quick towel

I had a towelling bathrobe, which got worn out at the collar, but had loads of good towelling fabric left in it. It was too much just to throw it out, so it has been lying various places around the house waiting for me to do something with it.
First I cut it along the seams, removed the pockets and dyed it in the washing machine with half a pack of Dylon purple machine dye. When I laid it out, it turned out to be not enough to make a bathrobe for my 8 year old daughter, as I originally planned.
So I decided to make a towel out of the back piece, since it was the largest. I had a piece of cotton fabric with pretty floral pattern, which kind of matched: it has a light and a dark purple, and my dyed fabric is in between.
I didn't want to spend too much time and effort on it, so for this project I didn't do almost any cutting. I ripped the towelling fabric to get a perfect rectangle, and I also ripped the patterned fabric along the cross grain to make strips 5 cm wide. These are to serve as bias binding, except that they don't have to be on the bias, because I am working only with straight seams.

It took some time to press the strips lengthwise. I was tempted many times to buy the gadget for making bias binding, but every time stopped myself: since I mostly do recycling/upcycling sewing projects, I don't want the costs to go out of proportion. So I do it by hand:


The binding was then pinned onto the towelling fabric to enclose its raw edges, and stitched.


And here is the result:


  It's too thin to be used as a bath towel, but works perfectly as a hand towel. Which made me think about making matching wash cloths from the remaining pieces...          


Sunday, July 13, 2014

Blackcurrant

This year we had a good crop of blackcurrant - 750 grams, to be precise :)  


Unfortunately, it's very sour, so it doesn't get eaten... After watching the bowls full of blackcurrant standing for the second day untouched, I decided to do something with it. I thought I would try a recipe from my "Concise Encyclopedia of Household" ("Краткая энциклопедия домашнего хозяйства"), 1984. This recipe doesn't involve any boiling, so the blackcurrant retains all the summery flavour and taste better than regular jam. My only concern is the storage: it's supposed to survive at room temperature for months, but I am not sure I will risk that, so probably will keep it in the fridge.
 It's very simple: clean the berries from the stems, leaves and other rubbish, wash them, dry and then pound with a wooden spoon or a pestle (which looks a little like a miniature baseball bat). I added an extra step here: because our blackcurrant is so unbearably sour, I added 1 teaspoon of baking soda to neutralize the acidity. I've seen this in the recipes using rhubarb, which can also be too acidic. After mixing in the baking soda, I had to wait a little, until it stopped foaming - about 10 min. The resulting mass is then mixed thoroughly with sugar - 1.5 parts of sugar for 1 part of blackcurrant.


For my precious 750 grams  I used 1.125 kg of sugar. The mix is then poured into sterile jars (I boiled mine for about 5 minutes). In the recipe it says to cover the mix with a 1 cm layer of sugar in the jar before closing the lid. I forgot to do that, so now it definitely stays in the back of the fridge...